How to Upload a Model to 3d Warehouse
Shopify AR powered by 3D Warehouse
This folio was printed on Apr 12, 2022. For the current version, visit https://assistance.shopify.com/en/transmission/products/product-media/3d-warehouse.
Shopify AR lets customers using the Safari browser on iOS 12 devices view realistic and interactive versions of your products in augmented reality (AR). With AR you tin can provide your customers with a ameliorate sense of the size, calibration, and detail of your products. The 3D Warehouse app enables AR experiences by allowing yous to upload 3D models and link them to products on your shop.
To let customers view your products in AR, install the 3D Warehouse app, get 3D models of your products, add together the 3D models to the app, edit your theme to enable AR Quick Look, and and so add together the AR badge to your 3D products.
Step 1: Install the 3D Warehouse app
Step two: Get 3D models of your products
Before customers tin view your products in AR, yous need 3D models of your products. 3D models are virtual representations of an object or surface in 3 dimensions. They permit you view the object from whatsoever angle.
Yous can hire a Shopify skilful to help you to brand 3D models of your products. In the Shopify Experts Marketplace, browse experts who offer the 3D model creation service, select an expert, and contact them.
Using the expert contact form, provide details about your project. If you want to provide product photos and product dimensions now, so make certain you follow the linked guidelines.
When you contact an proficient, you're not committing to hire a Shopify good. This step merely submits a request the expert who then can review your asking. If an skilful decides to work with you, and so they'll contact you with more information almost their fees and how you can beginning working together.
If you haven't provided product photos and product dimensions already every bit part of your job request, then the proficient requests them from you lot. Follow the specifications below when taking photos and measurements.
Product photos
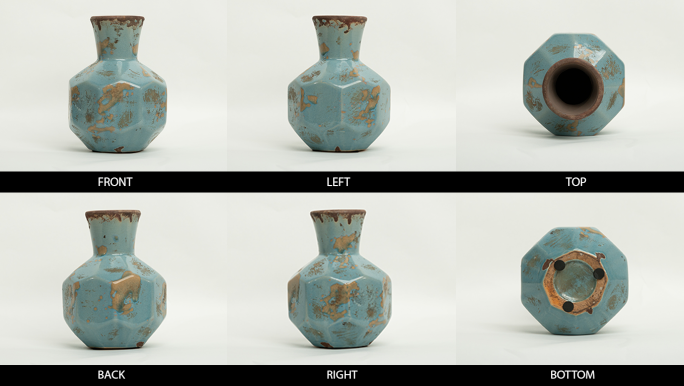
3D models are created using photos. To create the 3D model, the Shopify Expert needs photos of your products from multiple angles:
When taking photos of your product, follow these guidelines:
- Brand sure that your production is well lit.
- Make sure that your whole product is in focus.
- If possible, don't use a cellphone camera. For large products like furniture, use a camera with a 50 mm lens. For small to medium size products, use a 70 mm or 100 mm lens.
- Have extra photos of whatsoever unique details or textures.
- Requite the photograph files clear titles similar
blue vase - top, orblue vase - leftand store them in a clearly labelled folder.
Product dimensions
To create accurate 3D models, the Shopify Expert needs detailed measurements of your product. When providing measurements, follow these guidelines:
- Depict each dimension of your product in clear, simple terms.
- Provide the measurements in
mm. - Include a diagram to prove which dimensions the measurements correspond to.
- If you lot have technical drawings or CAD files associated with your product, include those likewise.
Example of getting 3D models made
Naomi is selling this blue vase:
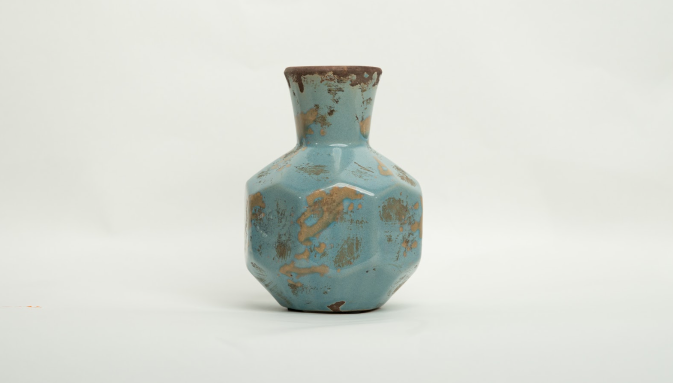
She installs the 3D Warehouse app, then uses Experts Marketplace to hire a Shopify expert to create a 3D model of the vase. Naomi provides the practiced with six high-quality photos taken with a camera with a 70mm lens:
Naomi gives the good a measurement diagram with respective production dimensions in millimeters:
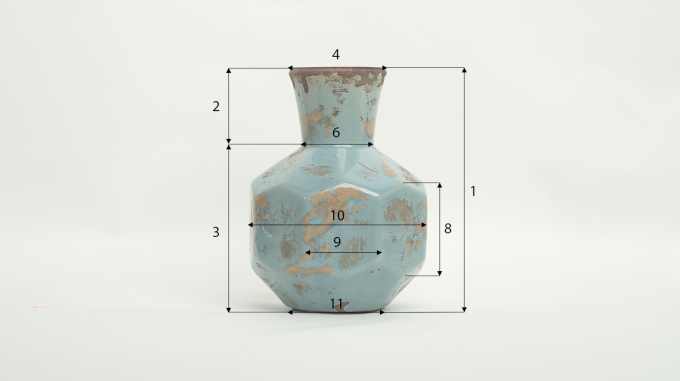
- The meridian of the vase (1) is ____mm
- The superlative of the vase to the bottom of the neck (2) is ____mm
- The bottom of the neck to the bottom of the vase (3) is ____mm
- The diameter of the mouth of the vase (4) is ____mm
- The width of the lip of the oral fissure (v) is ____mm
- The bore of the bottom of the cervix (half-dozen) is ____mm
- At that place are eight hexagonal faces on the vase
- The height of the hexagonal faces (8) are ____mm
- The width of the hexagonal faces (9) are ____mm
- The diameter of the widest office of the vase (10) is ____mm
- The bore of the bottom of the vase (11) is ____mm
- The diameter of the cream feet are ____mm
The Shopify expert uses these photos and dimensions to create a 3D model of the blue vase. The expert sends Naomi a .glb and a .usdz file for her to add together to the 3D Warehouse app.
Step 3: Check the quality of the model
When a Shopify good provides you lot with a 3D model, you lot should check that you're happy with its quality. The proficient should provide you with instructions for previewing the model.
Bank check the model from all angles. You tin can apply the glTF Viewer to preview your 3D models. While reviewing your model, consider the following questions:
- Does the model'south shape match the product reference photos that you provided to the skillful?
- Are all parts of the model proportional to the rest?
- If you're able to preview the model in augmented reality, then does the scale of the model wait right compared to the rest of the scene?
- Does the model await similar it's fabricated from the same materials as the product?
- Do the model'south materials look stretched, blurry, or distorted?
- Are at that place details like scuffs or scratches to make the model'southward materials seem more realistic?
- If parts of the product are transparent, cogitating, or requite off light, then practise they await right?
- Exercise the edges all look realistic? Are any of them too sharp and need to be softened?
- If there are any decorative details, such as a logo or some text, then are they easy to see?
- Are there any gaps or holes where there shouldn't exist any?
- Does the 3D model run across the technical requirements for the Shopify platform?
- The 3D model needs to exist a GLB file.
- The GLB file should be approximately 4 MB.
- The GLB file must not exceed 15 MB.
The Shopify expert should build the 3D model co-ordinate to sure standards. To learn more about those standards so that you can improve review a model, meet Creating 3D models for merchants.
If yous think that the quality of the model isn't good enough, then contact the Shopify expert and explicate what is wrong with it.
Step 4: Add a 3D model to the 3D Warehouse app
When you accept the 3D Warehouse app installed and have sourced a 3D model, you demand to add together the model to the 3D Warehouse app.
Steps:
- From your Shopify admin, click Apps.
- Click 3D Warehouse.
- Click Add 3D Model.
- In the Title field, enter a title for the 3D model.
- In the Linked Product field, select the production and variant that this 3D model is associated with, then click Select product.
- Click Upload File and select the
.usdzfile provided by the Shopify Expert. - Click Save.
Repeat the upload process for the .gltf or .glb file that your Shopify expert provided. Make sure you link it to the aforementioned production so that y'all have both 3D model file types associated with the product.
Accepted file types
Shopify experts provide two dissimilar file types for each 3D model, a .usdz file and a .gltf or .glb file. These unlike file types are used by different platforms and features. For instance, for customers to view 3D products in the Safari browser on iOS 12 devices, you need to upload a .usdz file. The best way to make sure that your online store is compatible with future augmented reality and 3D features is to upload both file types.
Step 5: Edit your theme to enable AR Quick Expect
You demand to edit your theme lawmaking to enable AR Quick Expect, which is the feature that lets customers using the Safari browser on iOS 12 devices view your 3D products.
Steps:
- From your Shopify admin, click Online Store.
- Side by side to your current theme, click Actions > Edit code.
- In the Layout folder, click {/} theme.liquid.
- Discover the
<head>tag. It should exist almost the top of the file. - On the next line, paste the following code:
<script src="https://cdn.shopifycloud.com/ar-quicklook-js/assets/v1/shopify3d.js" crossorigin="anonymous" ></script> - Click Save.
- In the Sections folder, click {/} product-template.liquid.
- Paste the post-obit code at the top of the file:
<script> (function(s3d) { if (!s3d) { panel.warn('"window.Shopify3d" does not exist. Delight ensure you\'ve added the <script> to your theme'); return; } {% for variant in production.variants %} s3d.mapMetafieldAssets('{{ variant . id }}', '{{ variant . metafields . shopify3d [ 'assets' ] }}'); {% endfor %} })(window.Shopify3d); </script> 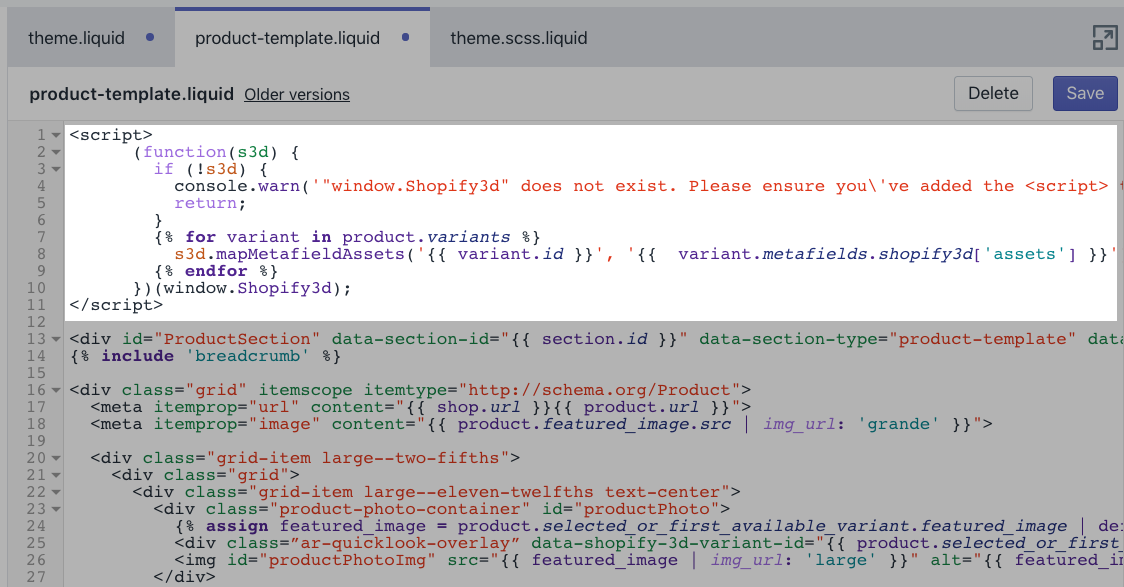
- Click Save.
If you use more than than i product template, then add together the code to those template files also.
Step 6: Add together the AR bluecoat to your 3D products
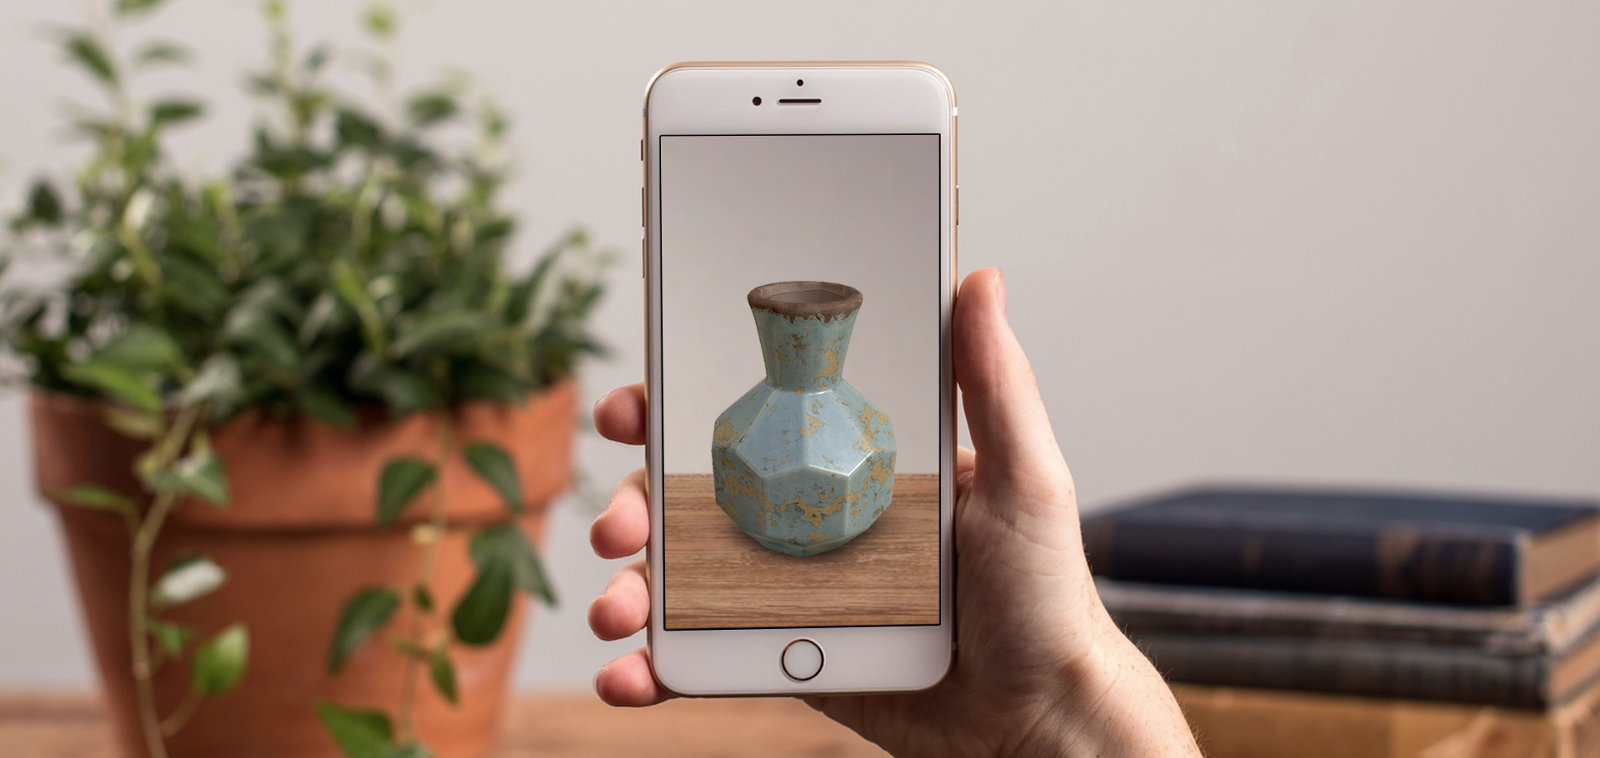
Customers using iOS 12 devices know that they can view your production in 3D when they run into the AR badge overlay:
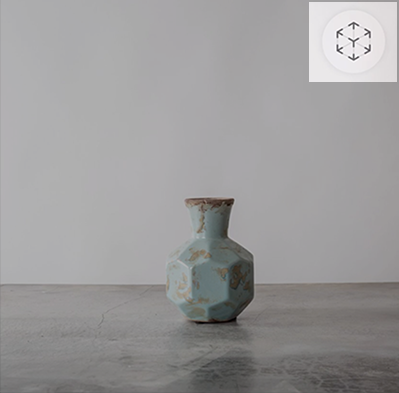
Yous need to edit your theme lawmaking to display the AR badge on product images.
Steps:
- From your Shopify admin, click Online Store.
- Next to your current theme, click Actions > Edit code.
- In the Sections folder, click {/} production-template.liquid.
- Discover the section of the template associated with your product photo. Await for keywords like
ProductPhotoorfeatured_image: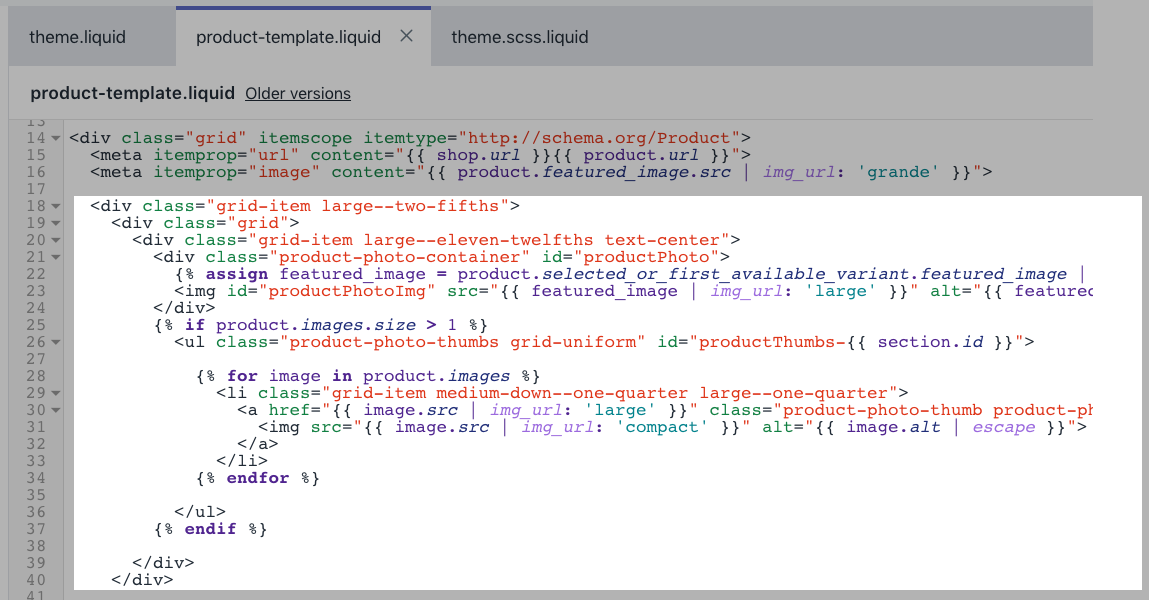
- Within the product photo section, discover the offset
<img... >tag. - On the line above that tag, paste the following lawmaking:
<div class="ar-quicklook-overlay" data-shopify-3d-variant-id="{{ product . selected_or_first_available_variant . id }}" manner="display: none;"></div> 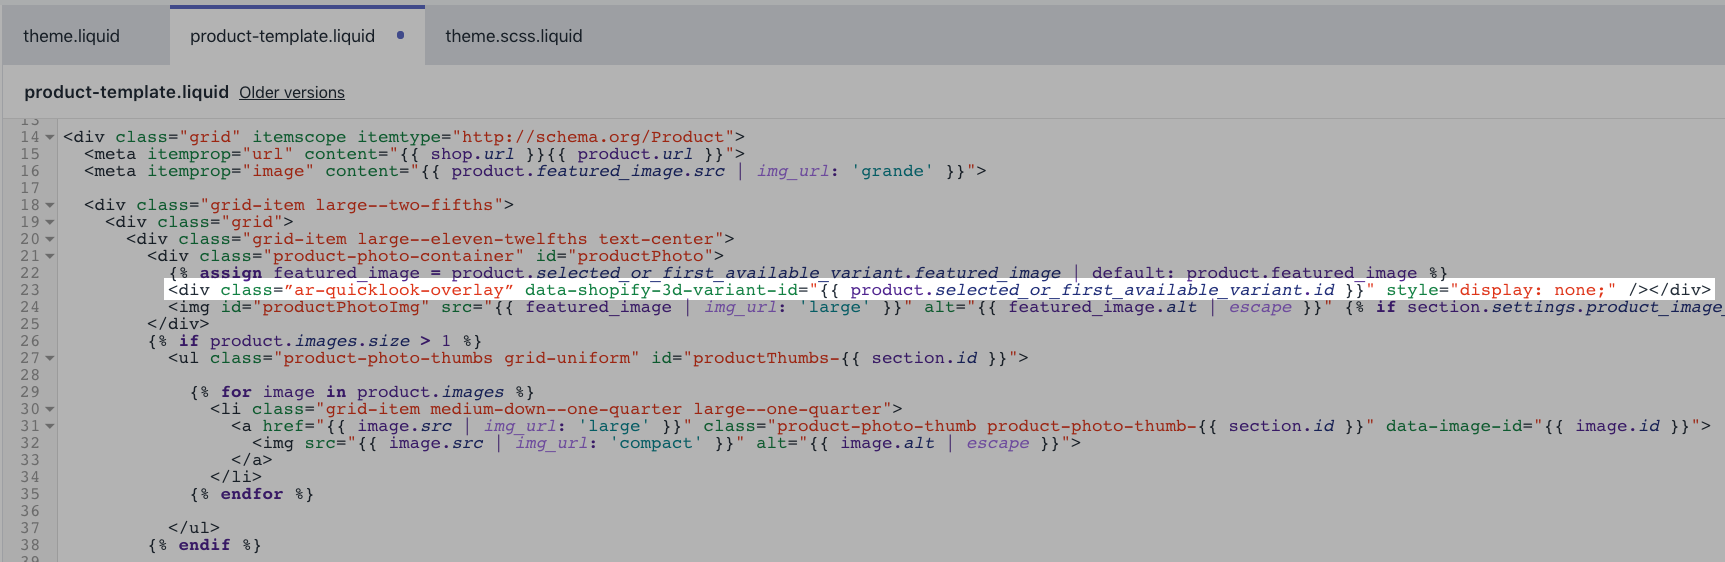
- Click Save.
- Open the file that contains your theme'south CSS. This file is commonly in the Assets binder and most often has a title such every bit {/}theme.scss.liquid.
- At the very lesser of the file, paste the following code:
.ar-quicklook-overlay { position : absolute ; width : 100% ; tiptop : 100% ; superlative : 0 ; z-alphabetize : 2 ; } - Click Salvage.
To examination your 3D model, open your online store in the Safari browser on a device running iOS 12, then navigate to the product folio. Tap the AR bluecoat in the product prototype to view it in 3D.
kinrosspressita74.blogspot.com
Source: https://help.shopify.com/en/manual/products/product-media/3d-warehouse